🔐 OAuth
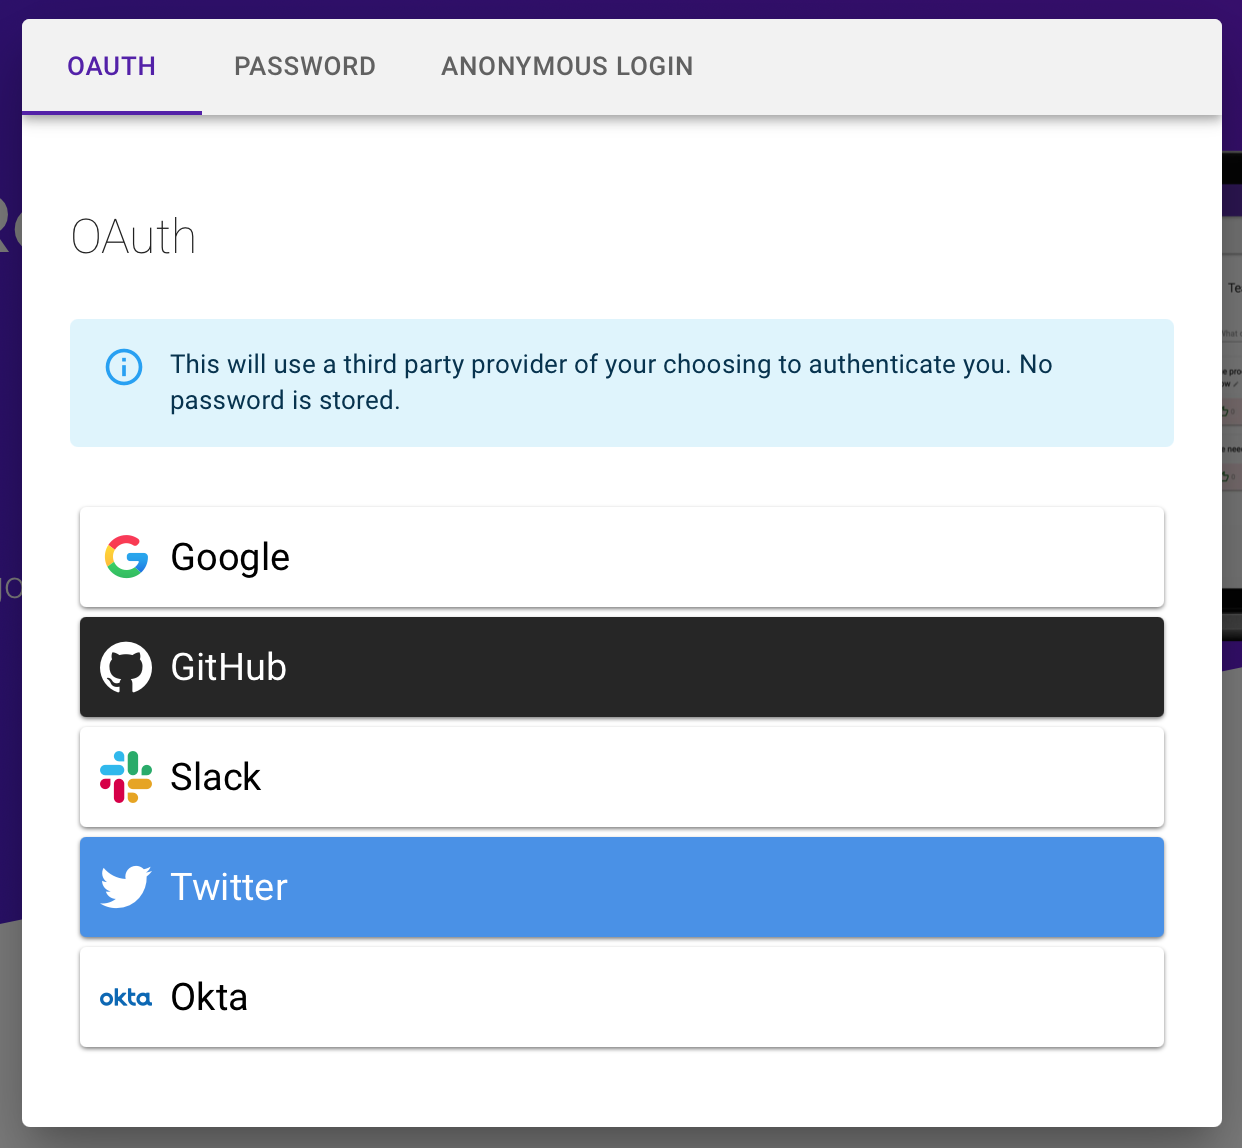
On the public Retrospected website, you will have noticed that people can register and login in one click using an OAuth provider:
You can provide the same seamless experience on your Self-Hosted instance by following the guide below.
The following works even if you are self-hosting on a local or corporate network. Your instance doesn't have to be reachable over the internet.
We will help you set up OAuth for Google and Github, but the process is similar for the other providers we support: Okta, Microsoft, Twitter and Slack.
Common setup
In order for OAuth to work, you need to setup the BASE_URL environement variable on your docker-compose file:
this is the URL to your self-hosted Retrospected (for example: http://retro.mycompany.com).
Look here in the full docker-compose file to get an example.
Github
If you are working in tech, chances are your users will have a GitHub account.
To setup OAuth for GitHub, follow the guide:
Create the keys
- Go to your GitHub profile (you need to be logged in)
- On the left-hand-side, find the
Developer settingsmenu: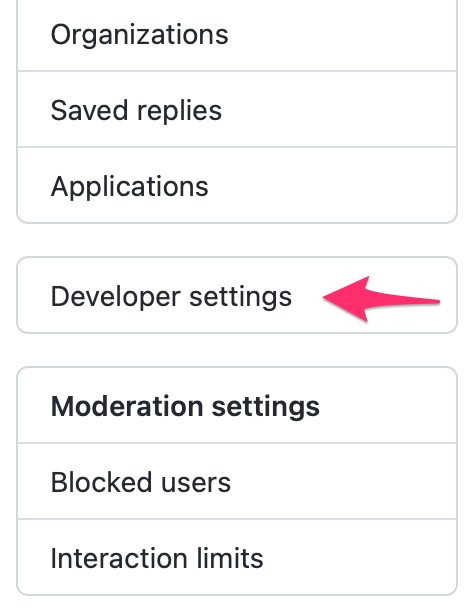
- Select
OAuth Apps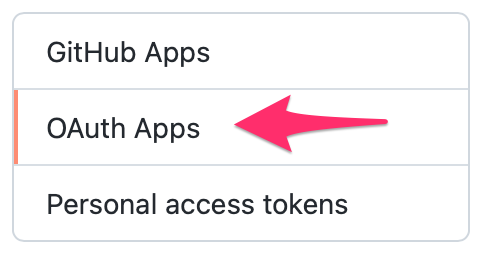
- Fill the following information:
- Application name: A name that you choose
- Home page URL: the publicly reachable URL for your instance of Retrospected
- Description: Some description of your choosing
- Authorization callback URL: This is the most important: it is composed of the domain followed by
/api/auth/github/callback.
- Click
Register Application - Your app is now created, and you need to now click on
Generate a new client secret. The page should now look like this: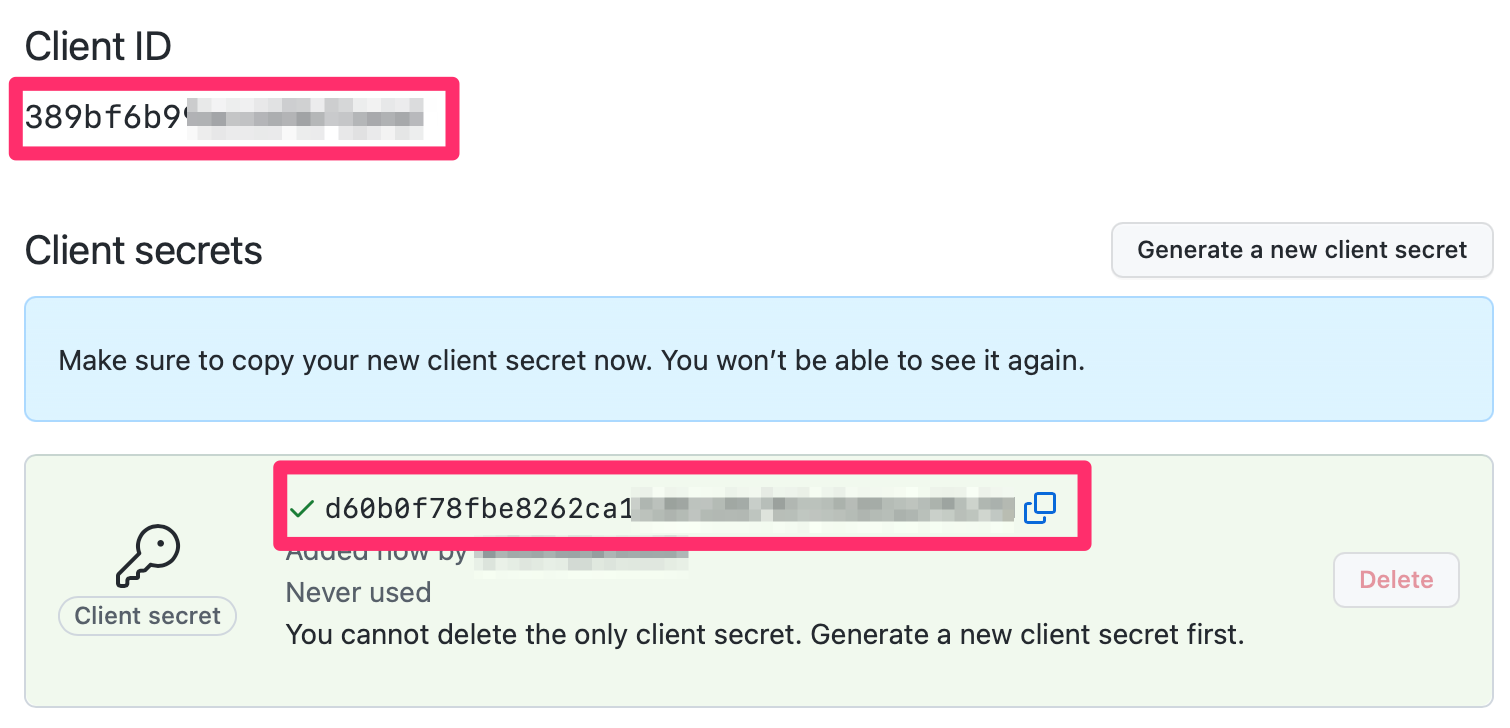
Install the keys
- Copy both the
Client IDand theClient Secretfrom the form above - In your
docker-compose.ymlfile, set them up respectively asGITHUB_KEYandGITHUB_SECRETin the backend section. Look here if you are not sure where these should be. - Restart your containers (
docker-compose up -d) and you should now be able to use GitHub to login 🎉.
Google
Create the keys
- Connect to the Google Cloud Platform dashboard
- Create a new Project (if you don't have one already)

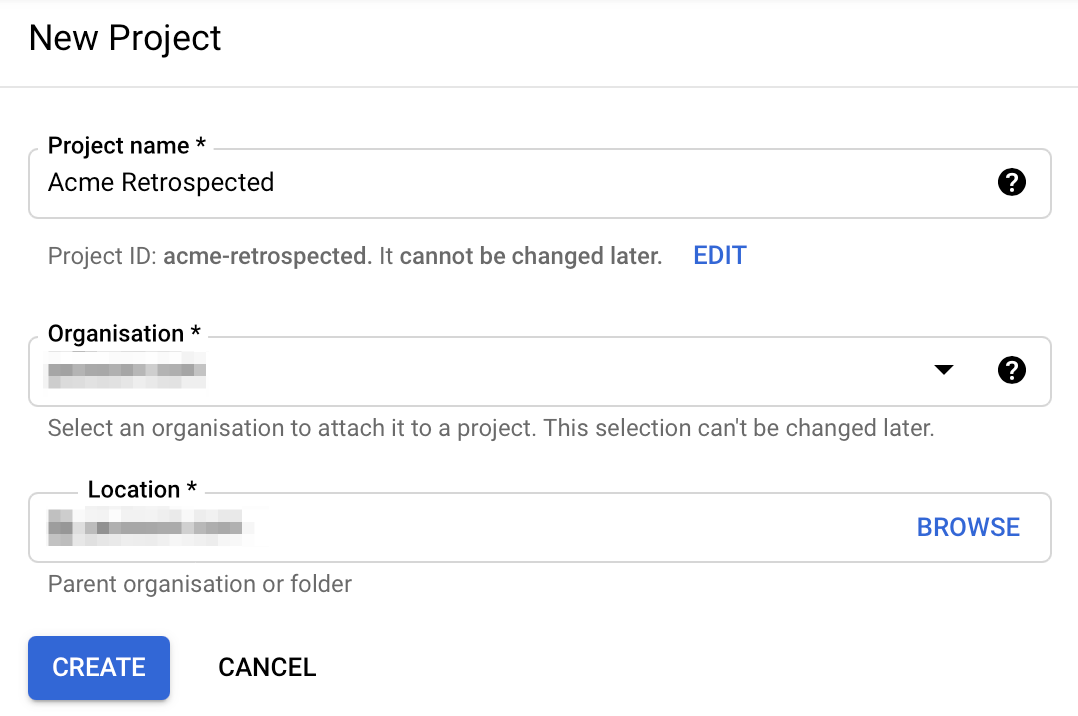
- Then select this new project (in the page header), and go to
APIs and servicesandCredentials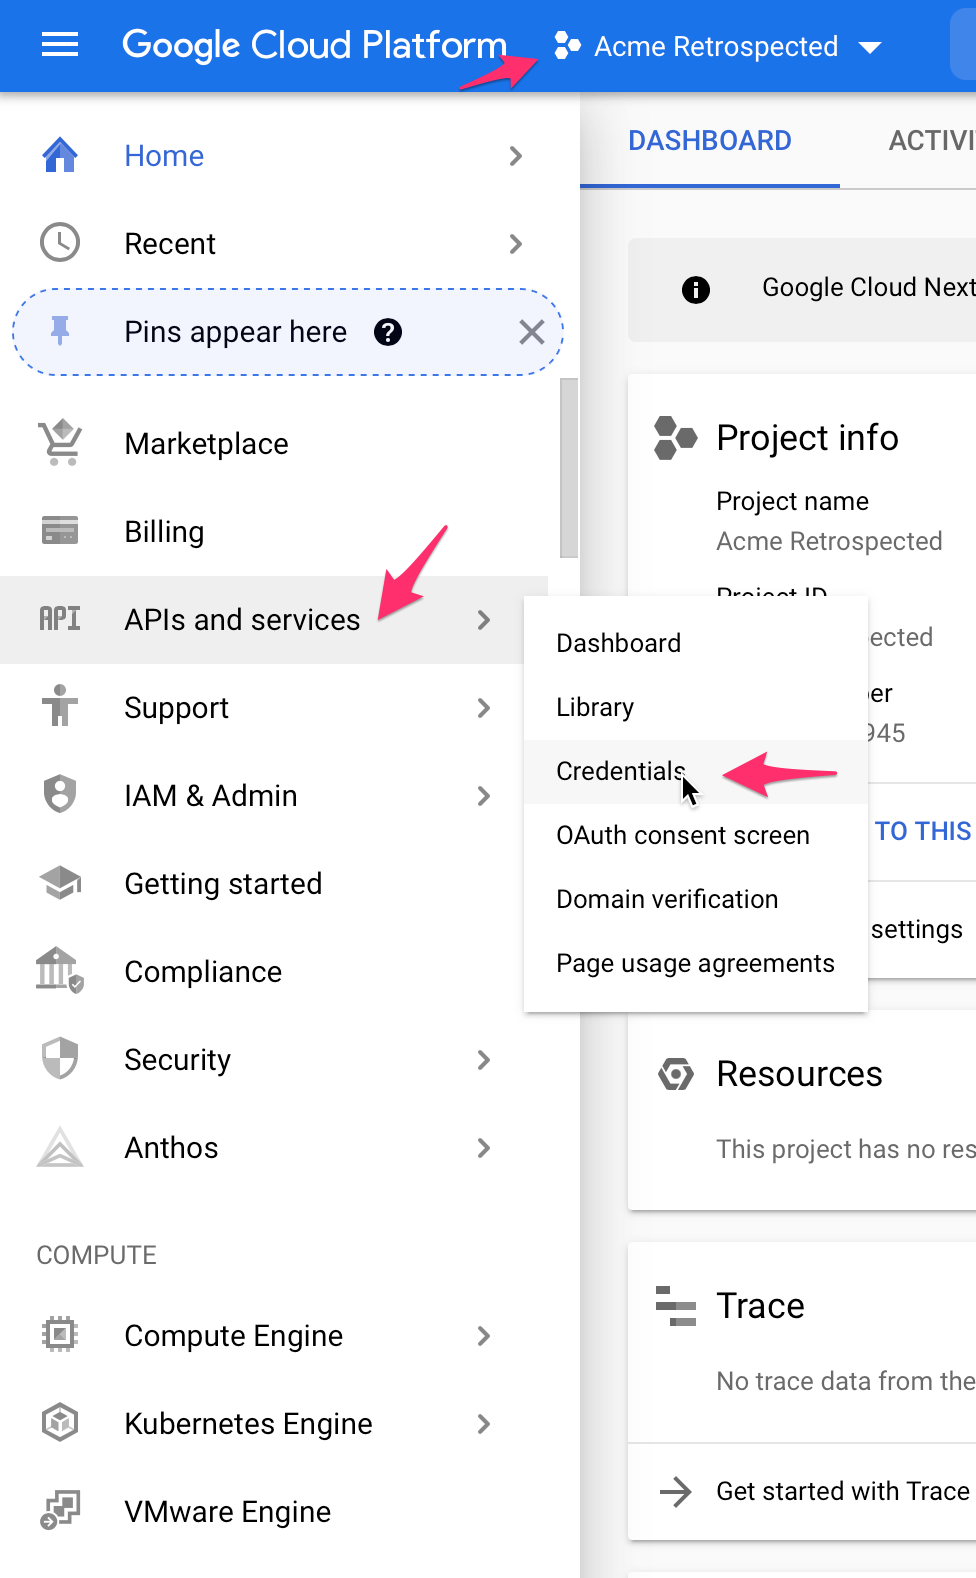
- Fill the
OAuth Consent Screeninformation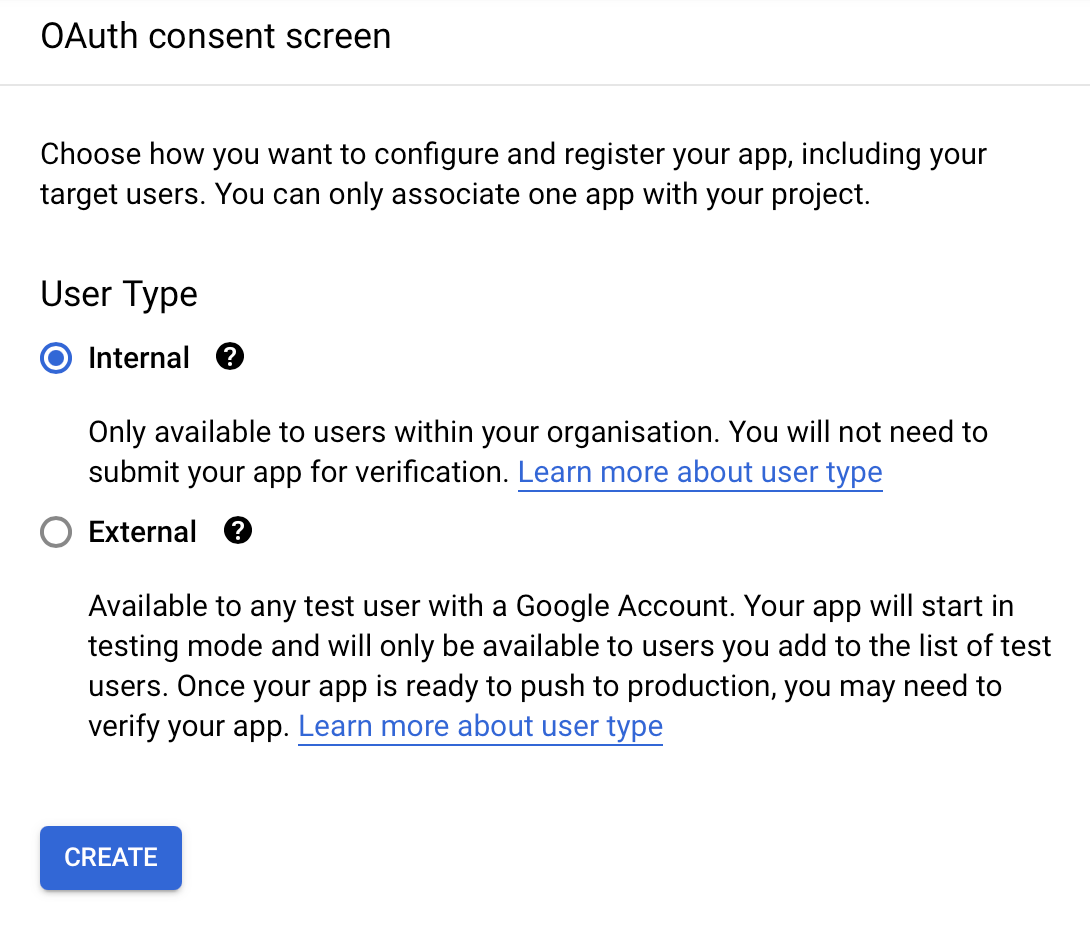
- Then go back to
Credentials, click onCreate CredentialsthenOAuth client ID.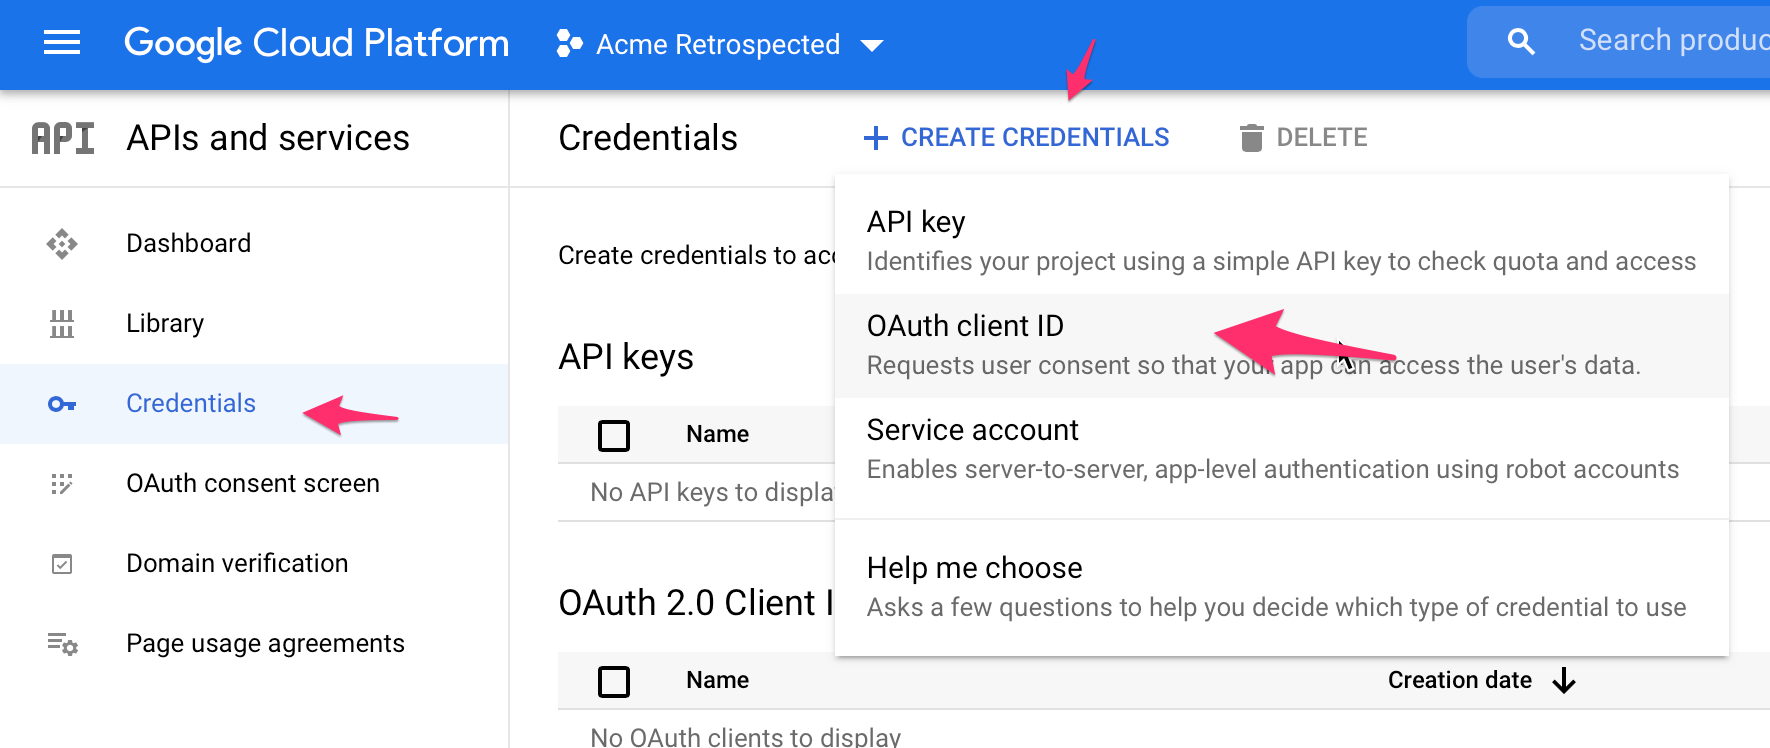
- Fill the relevant information, the important bit here will be the
Authorised Redirect URL. It is composed of the domain followed by/api/auth/google/callback.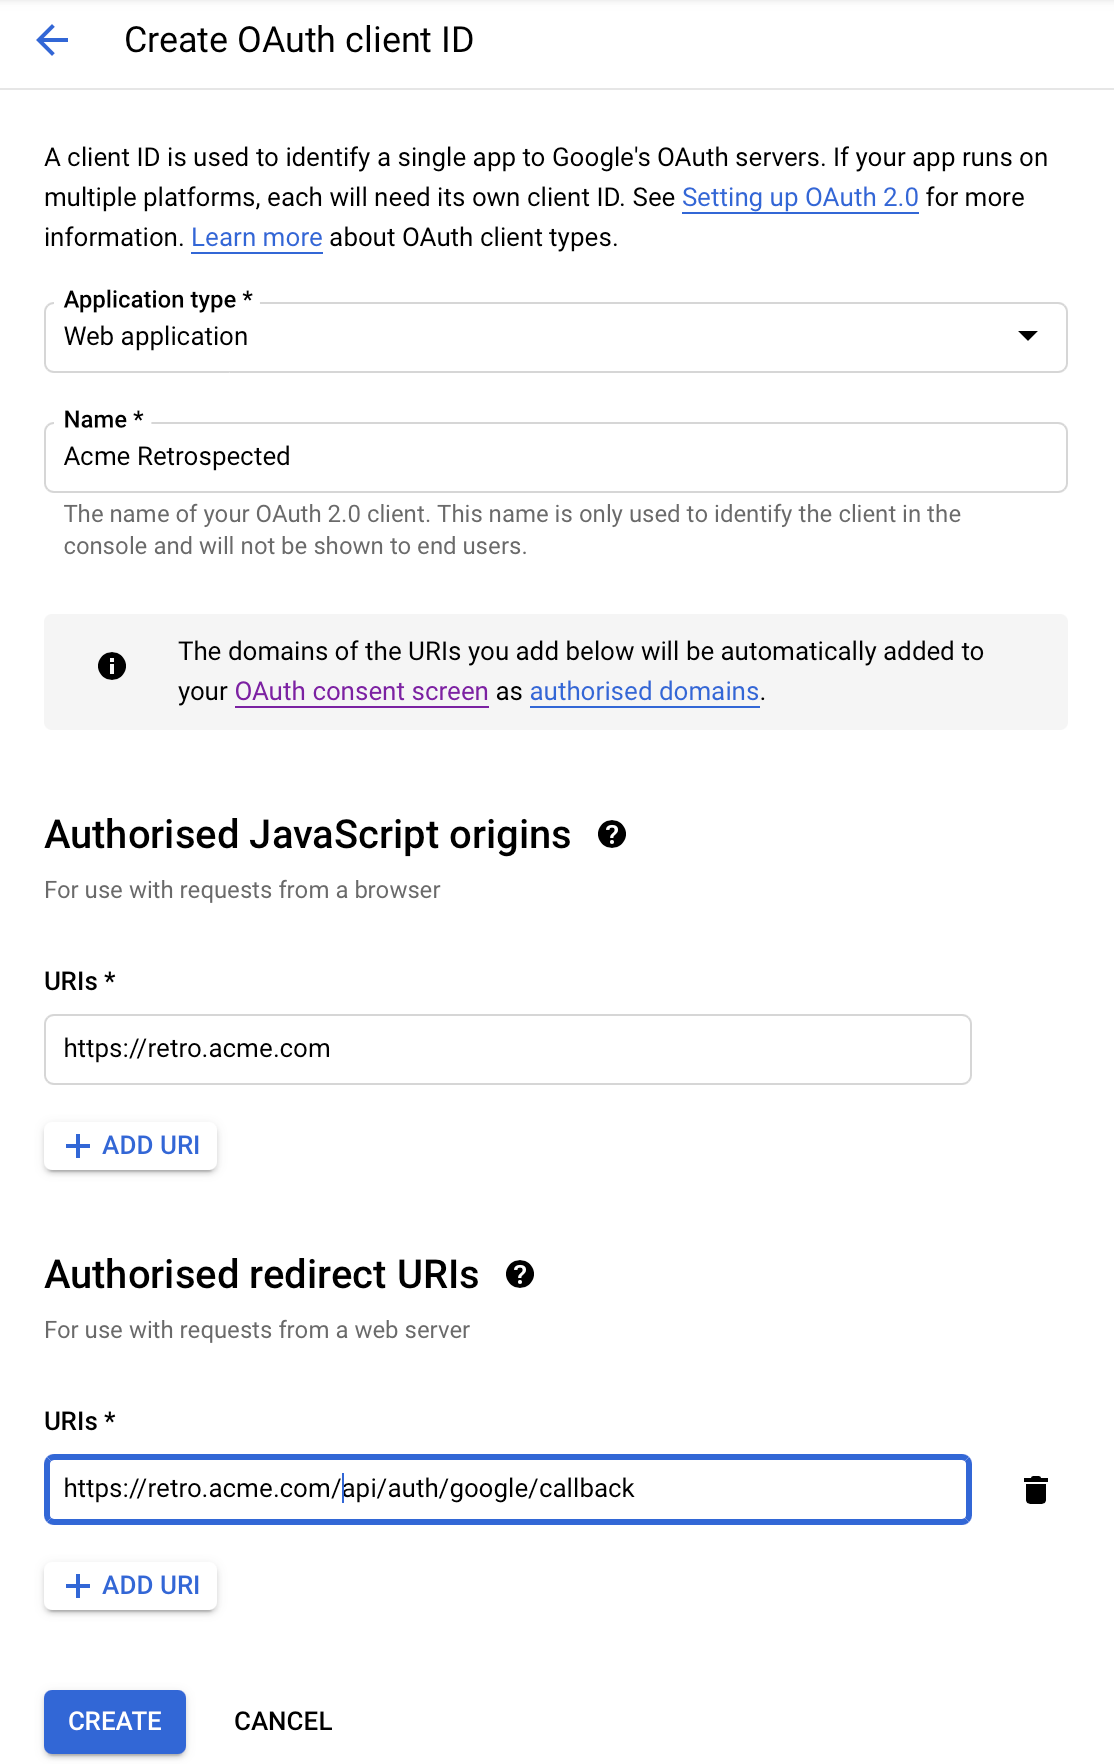
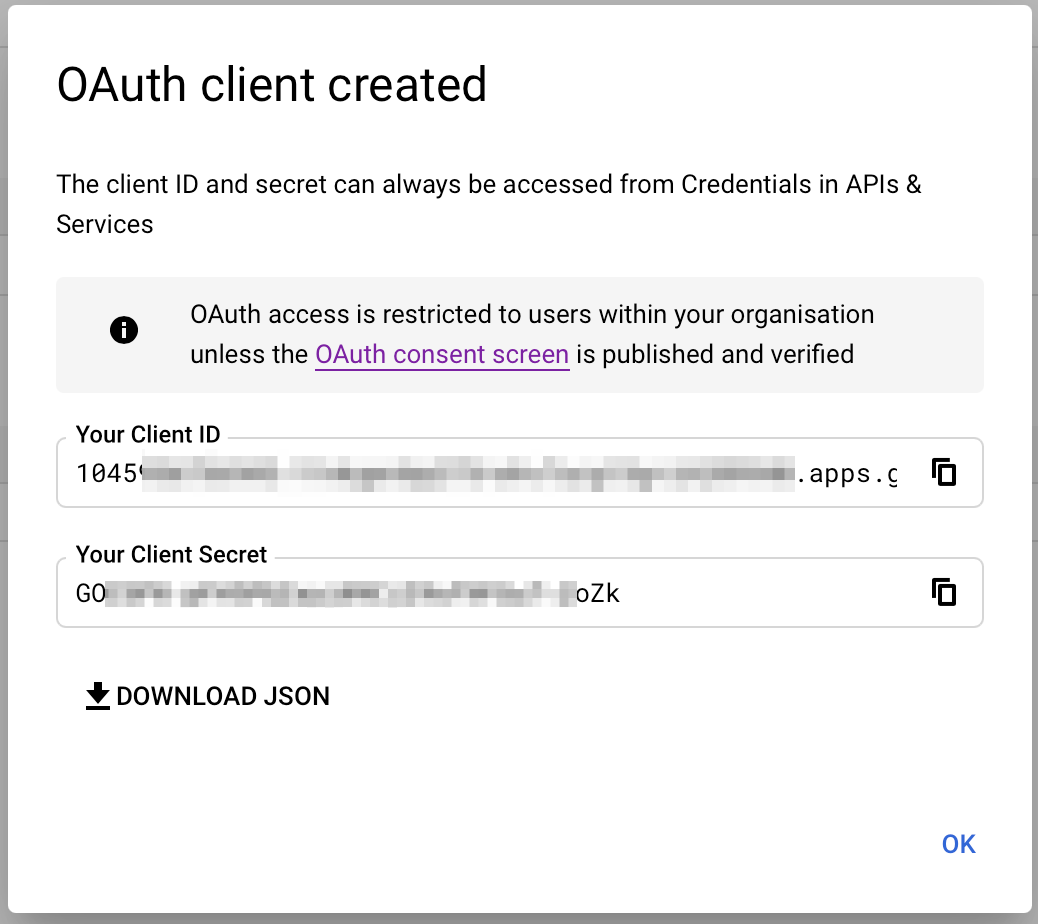
- You will then finally given two keys:
Install the keys
- Copy both the
Your Client IDand theYour Client Secretfrom the form above - In your
docker-compose.ymlfile, set them up respectively asGOOGLE_KEYandGOOGLE_SECRETin the backend section. Look here if you are not sure where these should be. - Restart your containers (
docker-compose up -d) and you should now be able to use Google to login 🎉.